Add or Edit an Event
When using My Church Events online calendar, the majority of the work you will do will be in the Add or Edit an Event window. This window will guide you through adding or editing any event with times, locations, directions, the title of your events, etc.
In this article
- Add a Quick Event
- Add an Event
- Change Event Colors
- Sort Order
- Location Field
- Event Times
- Adding Event Details
- Interest Groups
- Private Event
- Delete Event
You can add events in multiple ways. The first way we're going to discuss is a quick event which will you find on the edit calendar page. Start by clicking on the Edit Calendar button from the homepage dashboard.

Add a Quick Event.
Adding Quick events is a fast way of adding new events to your calendar when all you want to enter is an event's title, date, and time.
To add a quick event, go to the top right corner of the edit calendar page and click on Quick Event with the lightning bolt symbol.

Then add your title and time and click the Add Event button.

If this is an all-day event, leave the time fields blank and it will save as an all-day event.
You must supply a title for every event in order for it to appear on your calendar. The title for the event you provide will show on the calendar. The event title can be any plain text you wish to add.
An event title cannot be a hyperlink--doing so will cause the name of your event to not match correctly with your event details.
Add an Event.
There are three ways to add an event to your calendar with more details.
1. From the homepage dashboard.

2. From the Edit Calendar page, on the top right-hand corner.

3. From the Edit Calendar page, on the calendar itself by clicking the + sign.

The ONLY required field when adding an event is the title field. All other fields are options.
The Event Title can have up to 255 characters in it.
Change Event Colors.


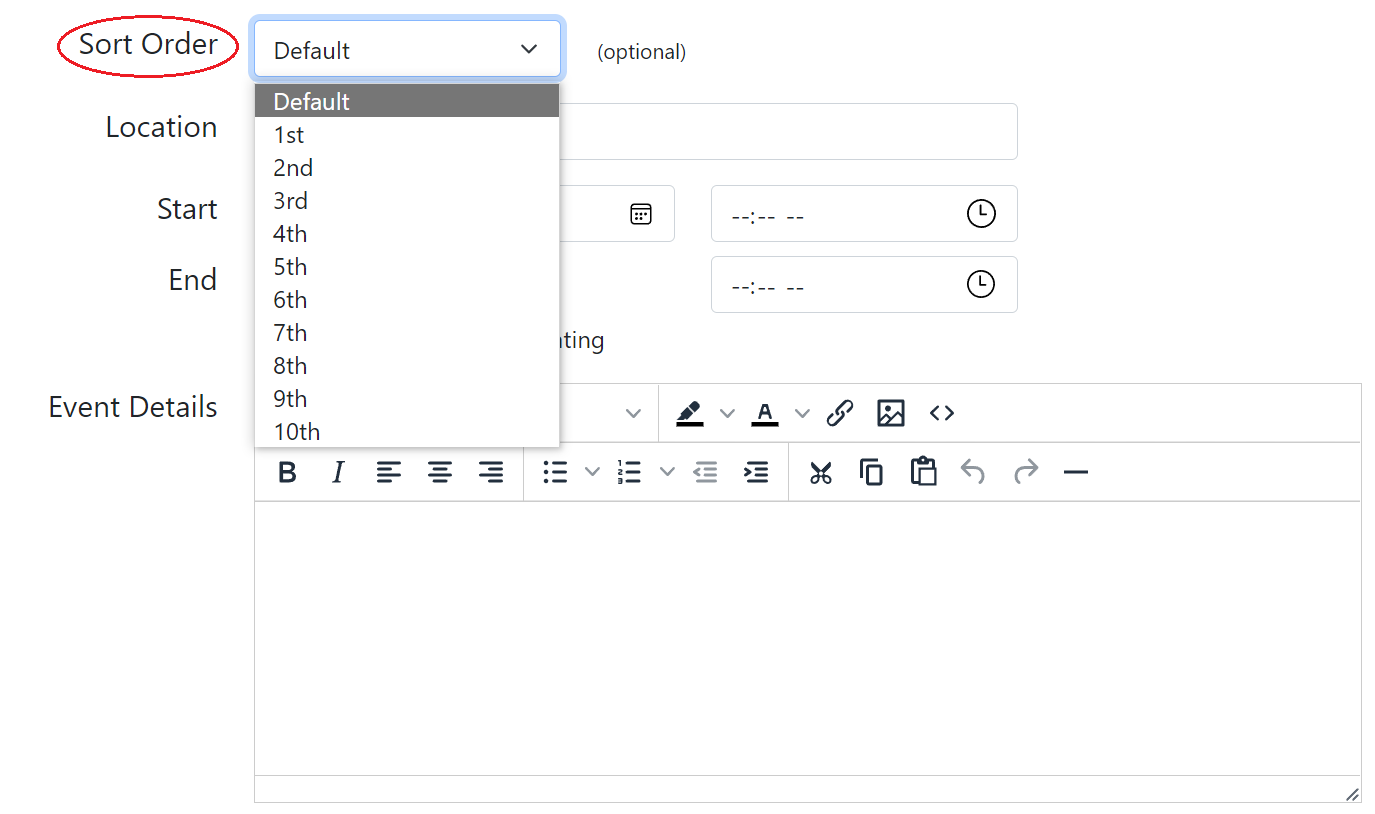
Sort Order
The Location Field
The Location field provides the ability to add a quick description of the location of any event such as Fellowship Hall, Choir Room, Pastor's Office, etc.
This field can be left blank.
You can add specific directions by creating a Map Link.
Add A Time to an Event
You can include start and end times for an event by clicking either the clock icon for a drop-down menu or you can manually type your start and end times by clicking on the dash marks.


If you choose to do an All day event, select the check box next to All day event and your time fields will disappear.

You can also select if this is a Recurring Event which is located next to the day All day event checkbox.
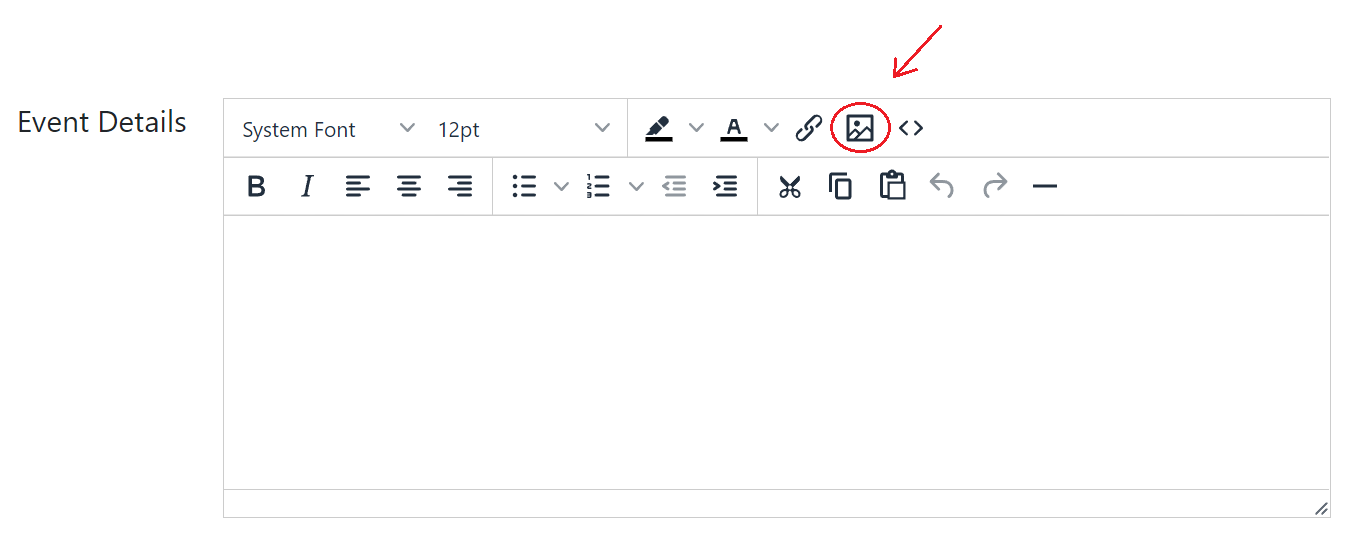
Adding Event Details
Search for an image from our Library, then simply click on the image you wish to insert.
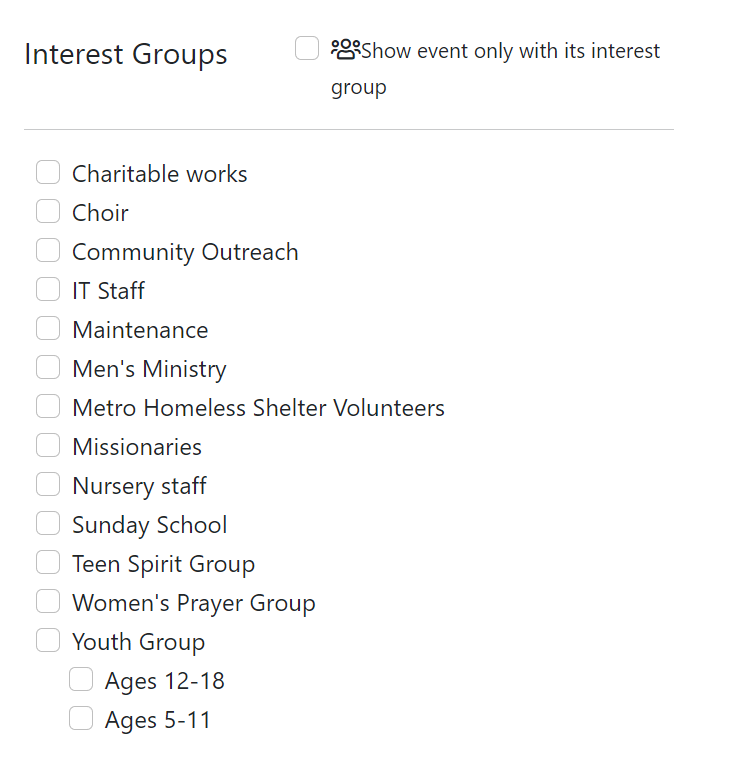
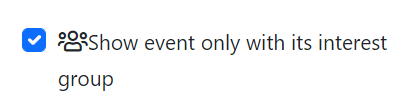
Interest Groups
Private Event
You may notice another feature, a private event which will allow you to hide an event from the public view. For additional information on this, please read this help doc:

Delete Event
To delete an event that you no longer want, click delete event on the bottom right of the page. You will then be directed to a page to confirm you want to delete the event. If you want to proceed click yes and the event will be removed from your calendar.

Q&A
Can we add private fields to an event?
Currently - all data you see on an event will be seen by viewers. If you have private information, you can use private events to hold it. For example, if an event has specific details about setup, teardown or how the event manager is, you can create a separate private event for that event that only those with the private event password can see.